How to effectively use a Brayden CPR manikin during training
Effective CPR training isn’t just about what you teach, it’s about how quickly participants can learn, adjust, and build confidence. The right training equipment makes all the difference. The Brayden CPR manikin is designed to do exactly that, using real-time visual feedback to improve both engagement and performance. But to unlock its full potential, it’s important to use it the right way. In this guide, you’ll learn how to maximise your training results with the Brayden manikin.
What makes training with Brayden different?
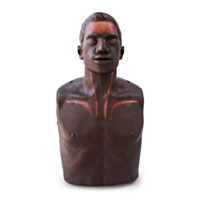
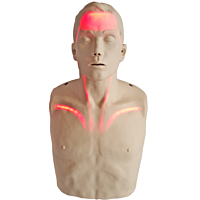
A Brayden CPR manikin provides visual feedback through LED lighting. This allows participants to immediately see the impact of their actions.
This allows trainees to instantly see:
- Whether compressions are effective
- If the depth and rate are correct
- When technique needs adjusting
For instructors, this means less guesswork and more targeted coaching. For learners, it creates a faster, more intuitive learning experience.
Step 1: Start with a clear introduction
Begin the training with a short explanation of:
- How the manikin works
- What the visual signals mean
- What participants should focus on
A short introduction ensures participants understand what they’re seeing—so they can fully benefit from the feedback from the start.
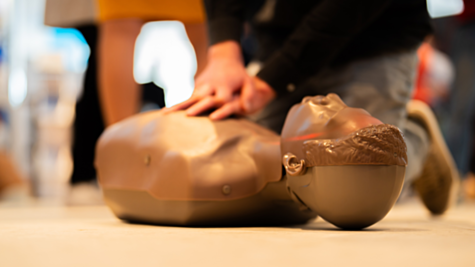
Step 2: Let participants explore first
Allow participants to practice independently before stepping in. The visual feedback helps them discover on their own:
- If they are compressing deep enough
- Whether their rhythm is consistent
- How small changes improve results
This hands-on approach increases engagement and helps skills stick faster.
Step 3: Use feedback as a learning tool
Discuss what participants see during and after the exercise:
- When was CPR effective?
- What changed when performance improved?
- Where did technique break down?
Linking actions to visible outcomes helps participants retain skills and apply them under pressure.
Step 4: Train with realistic scenarios
Incorporate real-life scenarios to make training more effective, such as:
- An incident in an office
- A sports-related emergency
- A situation in a public space
The Brayden manikin enhances these exercises by showing, in real time, whether actions are making a difference, building both competence and confidence.
Step 5: Repeat and improve
High-quality CPR comes from repetition.
Encourage participants to practise multiple times, using the feedback to improve with each attempt. Over time, this leads to:
- Stronger technique
- Faster response times
- Greater confidence in real emergencies
Common mistakes when using CPR manikins
Even with advanced equipment, some pitfalls can reduce effectiveness:
- Stepping in too quickly instead of letting participants learn
- Skipping the explanation of feedback signals
- Not allowing enough repetition
- Focusing too much on theory over practice
Avoiding these ensures you get the full value from your training sessions.
Who is this ideal for?
The Brayden CPR manikin is a strong fit for:
- First aid and BLS instructors
- Workplace safety programmes
- Training providers
- Schools and educational institutions
It’s particularly effective in group settings, where visual feedback keeps everyone engaged and involved.
Improve your training results
If you want to deliver more effective, engaging CPR training, the Brayden manikin is a proven solution. By combining real-time feedback with practical learning, it helps participants improve faster and retain critical lifesaving skills. Investing in the right training equipment doesn’t just improve sessions, it can make a real difference when it matters most.